What You'll Need:
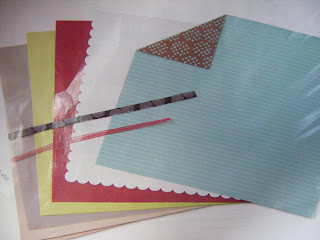
- 5 sheets of 12"x12" cardstock (4 different colours)
- 1 sheet of 11 1/2"x 11 1/2" cardstock with scalloped edges
- 1 sheet of 12x12 double sided patterned paper
- Chipboard, rubons, stickers, or other lettering options
- 1 24" length of 1/4" ribbon or equivalent
- 1 10 1/4" length of 3/8" ribbon or equivalent
- 1 3"x5" white lined index card
- coordinating stickers
- decorative rubons
- 6 mini brads
- 9 small embellishments
Cut It!
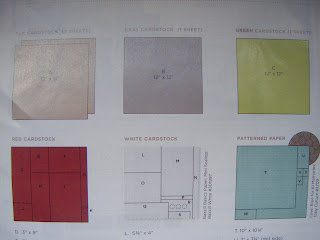
Use the patterns as a guide to cut your cardstock and patterned papers with scissors or a trimmer. Label the back of each piece RIGHT AWAY with it's corresponding letter. (This will help keep track of all pieces) -All measurements are in inches
 Tan cardstock (2)
A - 12x12
Gray cardstock (1)
B - 12x12
Green cardstock (1)
C - 12x12
Red cardstock
D - 3x9
E - 3x4
F - 5x4
G - 1x10 1/4
H - 3x8
I - 5x8
J - 3x3
K - Punch 7/8 circle from remainder and label as K
White cardstock
L - 5 3/8x4
M - 5x8
N - 3/4x11 1/2
O - 5 3/4x5
P - 5x1/2
Q - 7x2 1/2
R - 7/8 circles (cut 3)
S - 3 1/4x1
Note: this sheet is 11 1/2x11 1/2
Patterned Paper
T - 10x10 1/4
U - 2x3 3/4(dot side)
V - 1x1 1/4 (dot side, cut 3)
W - 3 1/4x1 3/4
Ribbon
X - 5 1/2 length of 1/4 ribbon
Y - 6 1/2 length of 1/4 ribbon
Z - 2 3/4 length of 1/4 ribbon
AA - 3 3/4 length of 1/4 ribbon
BB (second ribbon)
BB - 10 1/4 length of 3/8 ribbon
 To Create This Project
- start with A (2 sheets)
- add E, H, X & Y, aligning pieces across background pages
- adhere N and overlap with one large vertical or 3 horizontal photos
- add F and D. Arrange photos and P. then adhere.
- Journal on index card and adhere on layout
- tie all three Zs on embellishments and add to layout
 To Create This Project:
- fold in half
- fold AA around W and adhere ribbon ends behind W. Add W and S to card.
- trim all three Rs into ice cream scoops and adhere overlapping Vs
- finish with embellishments
 To create this project:
- start with C
- add T
- cut O into strips for journaling
- arrange Q, O strips and photos, overlapping as shown.
- Adhere
- Finish with embellishments
 To Create This Project:
- start with B
- add G, BB & J
- arrange L and photos, overlapping as shown.
- Adhere
- Place K behind one letter in the title
- Finish with embellishments
 To create this project
- fold M in half
- Add U
- swipe inkpad across bottom inside edge of card to highlight scallop design once closed, if desired
- finish with embellishments


No comments:
Post a Comment